With Zero Touch Mesh, it is possible to expand your WiFi coverage without having to carry data cables. It is sufficient if the new Access Point is within range of an existing AP. Such a network is called a Mesh network, and the APs in the Mesh network communicate with each other over the air, not over cables.
It is possible to build Mesh networks only, as well as networks where some devices are connected by cables and others by air.
Through an air connection from one AP to another is called a "jump", the maximum number of jumps is configurable, but Ruckus does not recommend more than 4 hop links.
The first AP of the mesh to which the other APs connect over the air is called the Root AP, the connecting APs are called Mesh APs. Ruckuse Mesh is "smart", if any Mesh AP disappears in the meantime, the network will reconfigure, Mesh APs will find a new path to the Root AP.
The connection between the two Mesh APs takes place over a 5GHz link, so in terms of network design, it is also worth considering turning off the 5GHz WLAN option for the Mesh APs, leaving only 2.4 GHz WLAN.
Zero Touch Mesh is an option to configure the Mesh network so that the new Mesh AP to be added does not need to be configured before. This greatly simplifies the installation work, the technician can easily set up and start the AP from the factory. You do not need to configure the AP on site or in advance. However, the MAC address and serial number of the device should be recorded in the past.
The Zero Touch Mesh feature has been available in vSZ since version 5.0.0. Let's look at how to configure vSZ and the process of adding an AP to an existing network.
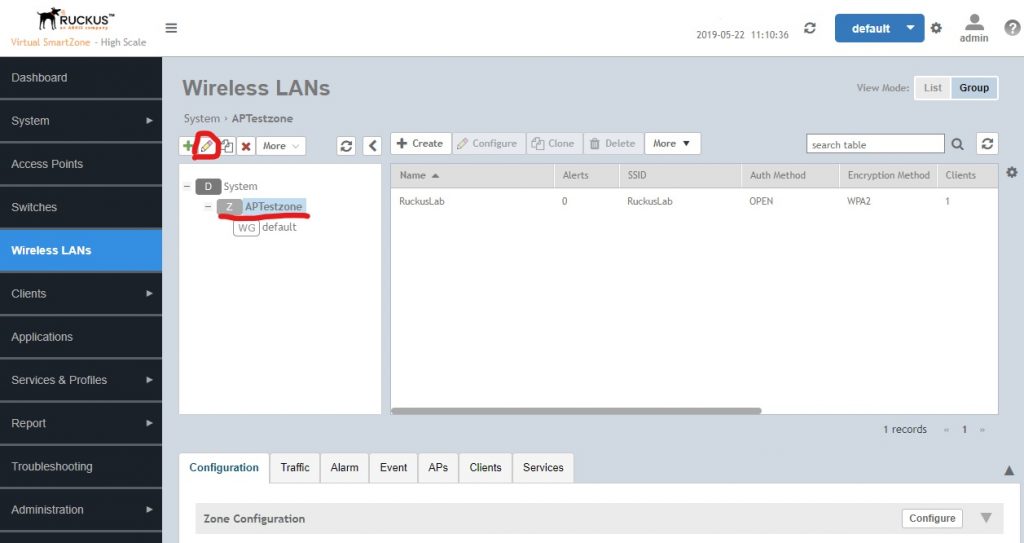
To get started, select the network in which to configure Mesh with the Zero Touch Mesh option and press the Configure button.
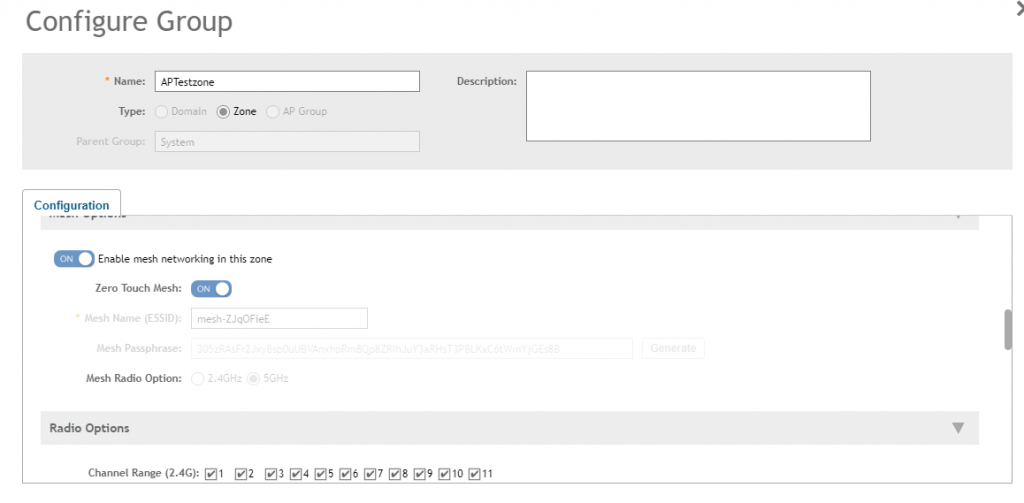
We then activate the Mesh network with Zero Touch Mesh. As you can see, Mesh operates in the 5GHz frequency band.
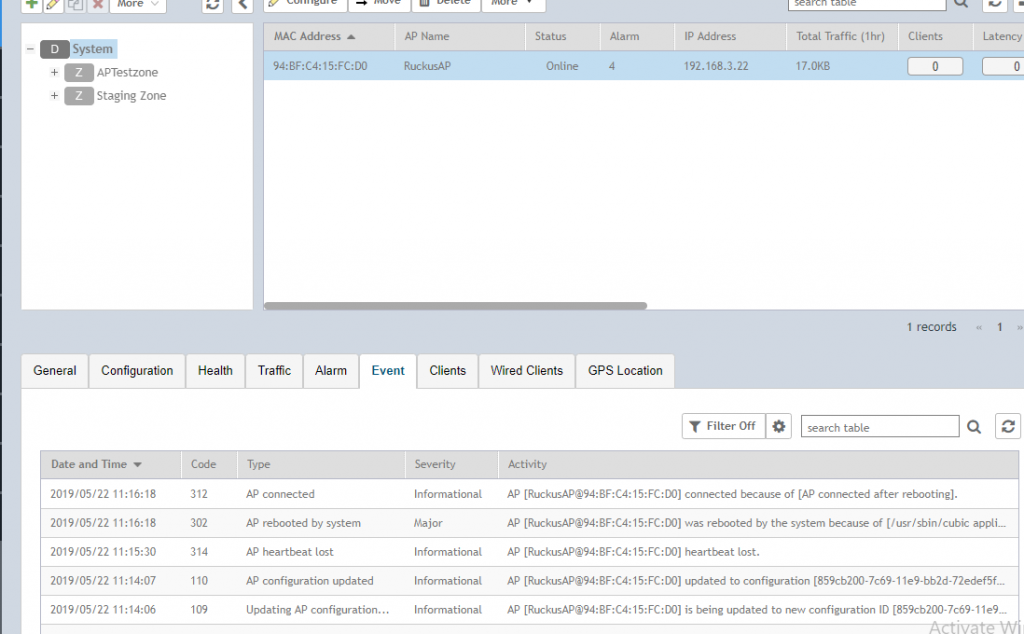
The AP then restarts when the Mesh setting is applied. This can be tracked by selecting the AP and the Events subcategory.
You can also see that Mesh is activated in the Configuration section:

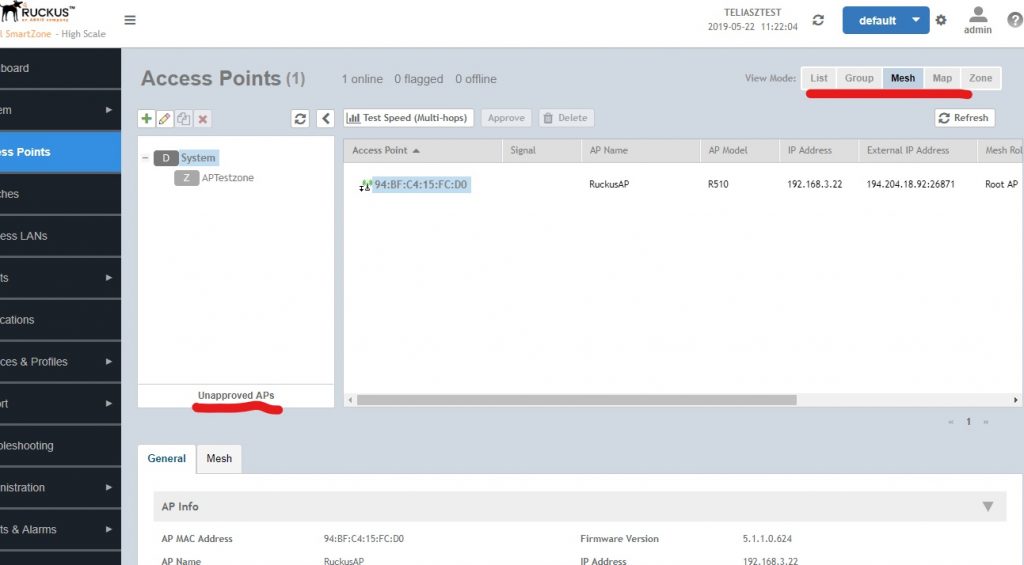
Now by selecting Access Points from the menu on the left, you can see that a new subdivision has been added: Mesh. Selecting this will show all networks in which Mesh is enabled. In addition, there is a distribution in the Unapproved AP.
Now is the time to launch Meshi's add-on AP. The AP should be with standard Ruckus standalone AP software, such as version 110.0.0.0.663. The device should be factory reset, that is, either brand new or a factory reset. If the new device is in the Root AP coverage area, after a while (5-10 minutes) it will appear in the AP Unapproved AP distribution as "Pending Approval".
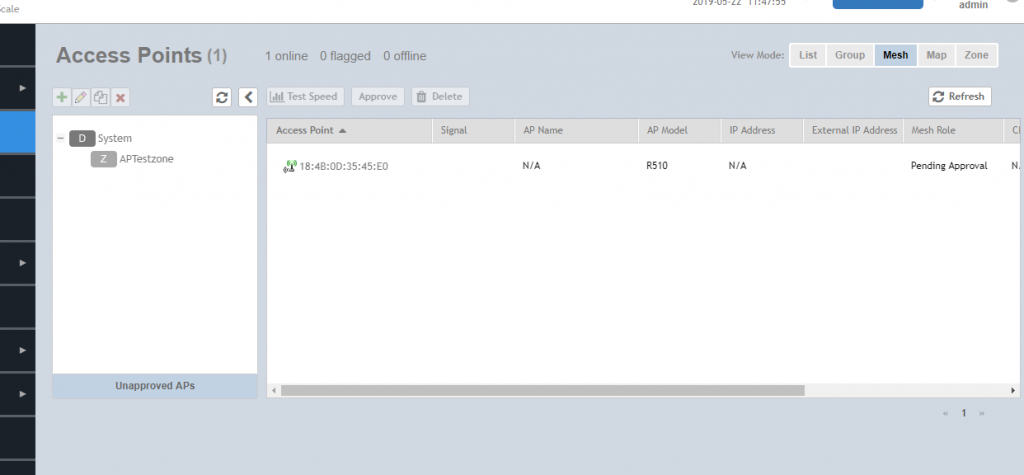
Then select AP, press "Approve" and add the last 4 digits of the device serial number.
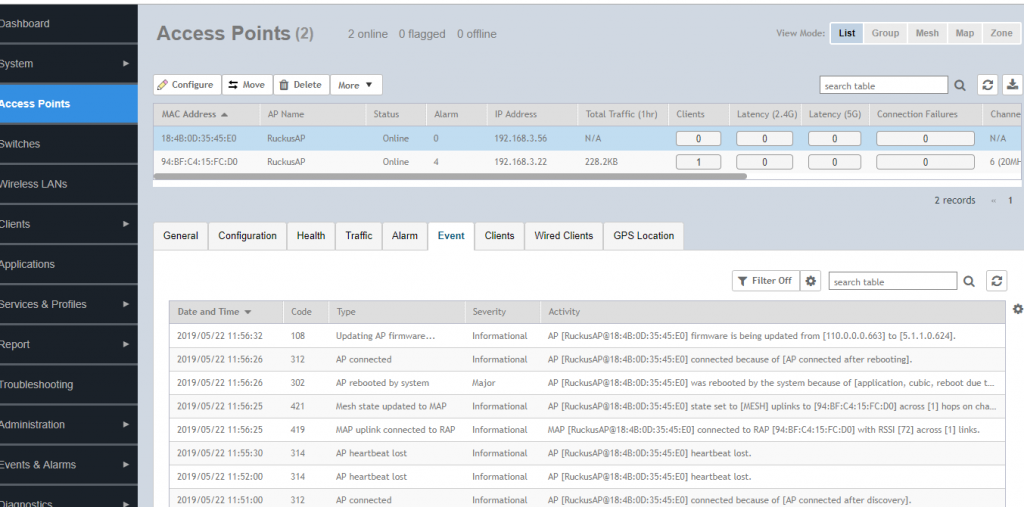
The new device will now remain in the Approved state and begin synchronizing with the existing network. This includes software updates and setup and may take an additional 5-10 minutes.
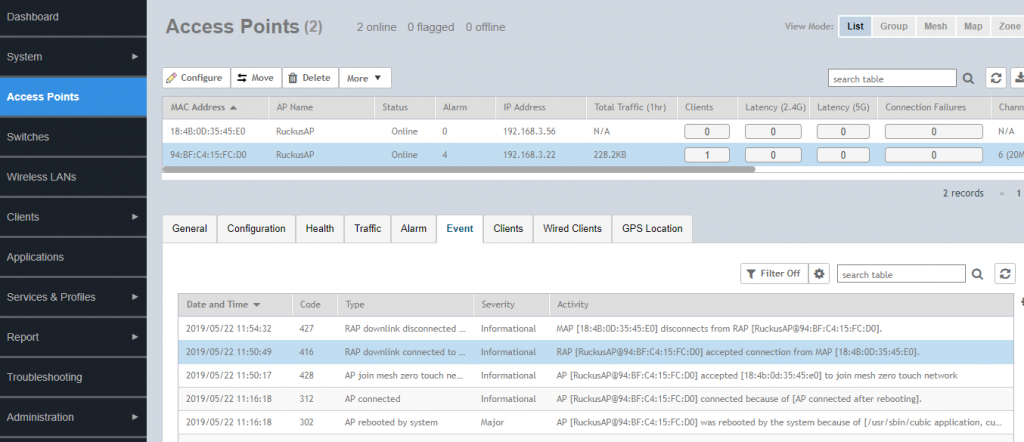
The settings can be tracked from both the AP to be added and the Root AP from the "Events" section.
Finally, in the Mesh view, we see the Root AP and the Mesh AP connected to it. This is a confirmation that the connection has been successful!

